Saturday, July 28, 2012

Quilt along- picking fabric and cutting

So I have a HUGE stash of fabrics.  Some I have bought with I am sure something in mind, and some of it I do actually remember why I had bought it.  This fabric is some that I had bought last fall with EVERY intention of making a quilt.  Well I am now almost out of room in my fabric stash, so now it is time to make this quilt... So a quilt along anyone? 

I liked the ragged quilt my sister had made and had also seen a quilt that just had a whole bunch of mis-matched squares.  These are the two quilts that I used as an inspiration for my quilt.

Materials:
-1.5 yards of 7 different colors of fabric (I used four solid colors and three fabrics with a design)- total of 10.5 yards with a little left over
- 3/8 yard of coordinating fabric for binding
- batting (I like the 100% cotton batting)
- 3 5/8 yards for backing


 I want a quilt that will be a good sized lap quilt- so about a 48" x 64".   As with my sisters ragged quilt that has ragged squares, I want it a little more intrecit and have it as ragged triangles. 

For the first week, I cut all of my triangles.  The large squares measured 8.5" x 8.5"; medium squares were 6.5" x 6.5"; and the small squares were 4.5" x 4.5".  I needed 7 squares of each size and each color.  I then cut each of them in 1/2 to make 14 triangles of each size and each color- total of 96 (you will only need 13 triangles for two of the colors of each size).  With each of the large squares measuring 8.5" x 8.5" with a 1/4" seam allowance, I will have a quilt with 6 squares along the top and 8 down the side, this quilt will measure 48" x 64"- slightly smaller, but still a good size.


Next week I will be working on mixing and matching the triangles to get 96 stacks of triangles.  Lots of sewing ahead!
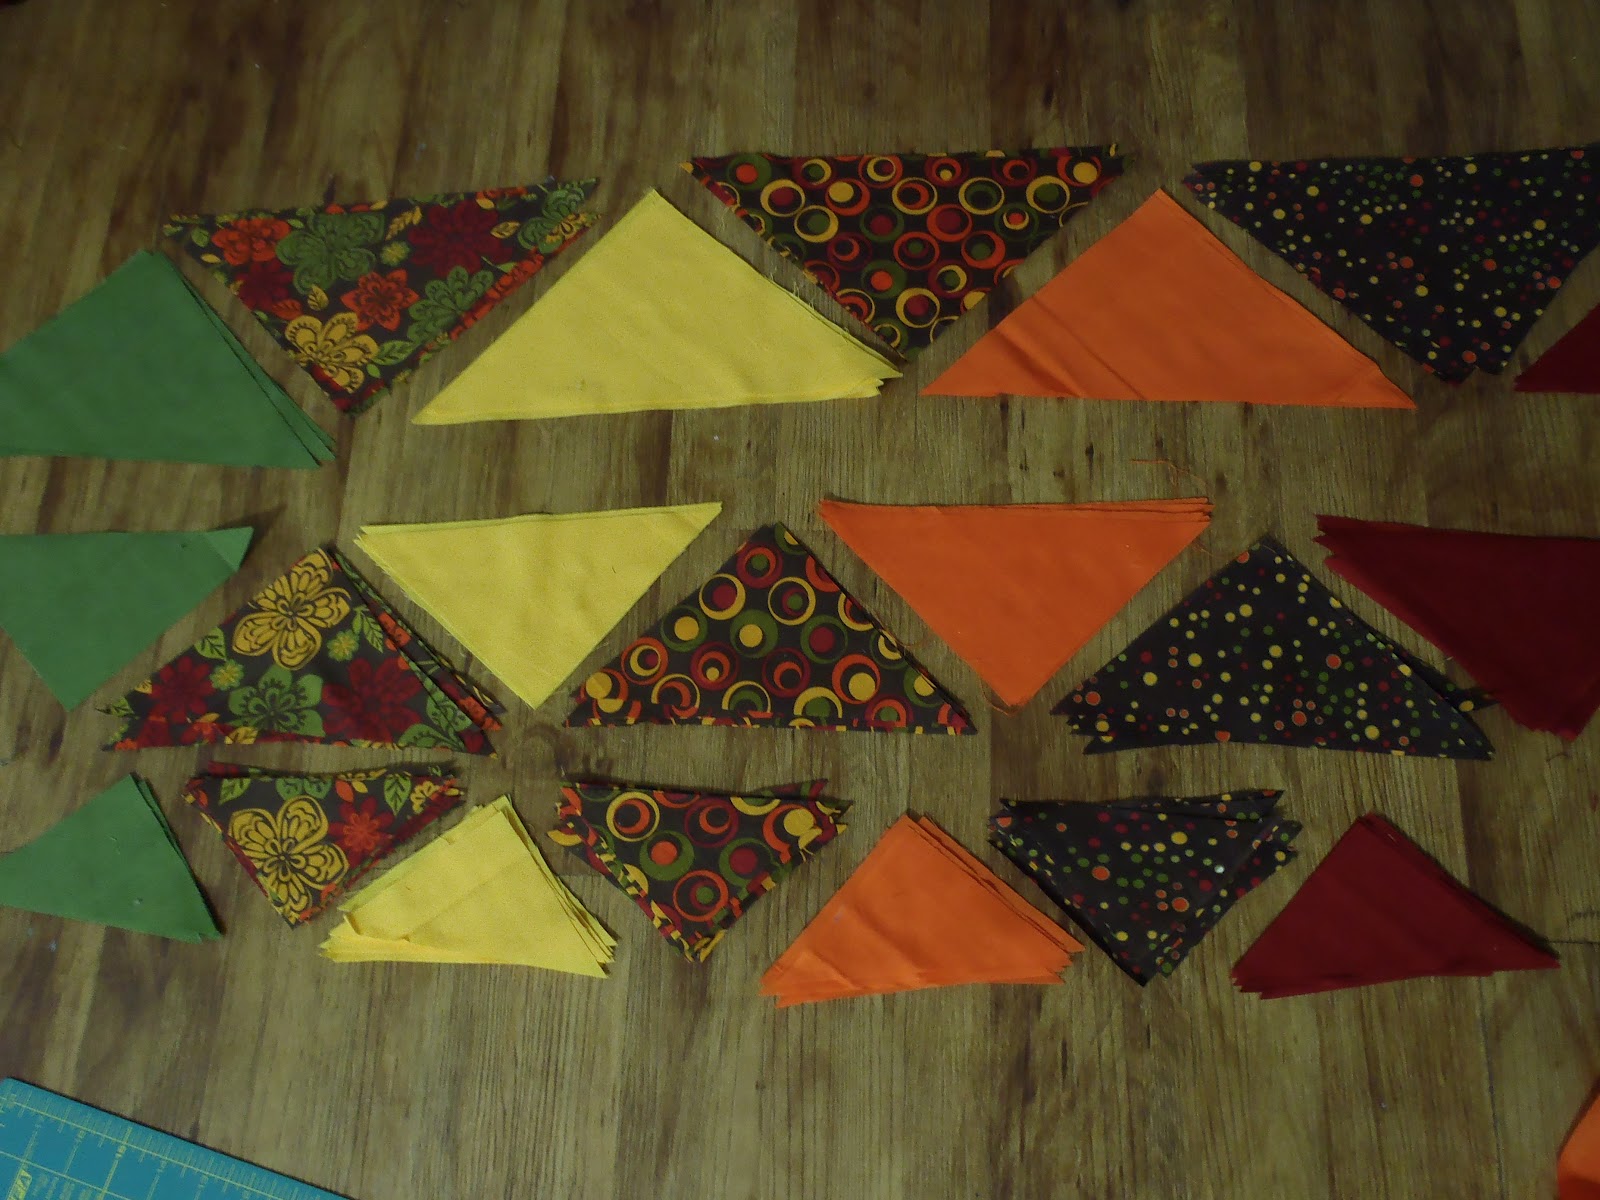
Be sure to keep all of the little scraps- they will make a great quilt later... another project!

Saturday, July 14, 2012

Valence and Pillow


My sister and I went shopping for fabric for her new place a little over a year ago...yes it took me this long to finally get around to the project.  She wanted a valence and pillow.  The project itself only took a couple of hours to do and it should look wonderful in her place.  At least she is still at the same place as when I originally took the measurements for the valence.

I absolutely LOVE this flower fabric.  I have enough left that I should be able to make a pillow or two for myself. 

Her new decor should go wonderfully in her place.  We both love reds and bright colors!

Thursday, July 5, 2012

Baby Boy Gift Set


Set includes:
1- Bib
1- Burp cloth
1- Diaper and wipe strap
1- Soft plush block (embroidered designs include baby boy owl, baby boy turtle, baby boy frog, and baby boy grasshopper)


Purchase here

Feel free to contact me to have it personalized!

Wednesday, July 4, 2012

Game Day Dress


Football seasonwill be here before we know it. A perfect game day dress for my favoritecollege team!

On Thursday, July12thI will be teaching a class on how to make a game day dress. Feelfree to email me to sign-up for the class and supply list- class size islimited. The class will be at Bernina Sew and Quilt in Waco, TX and start at 6p.m. Call 254-7712887 to reserve your spot. I would love to have you join.

Thursday, May 31, 2012

Quilt by Sister

Front of quilt
Back of quilt

We are a true Baylor Family! My sister has some of the best quilts and ideas...if only she had more time to create everything she came up with...

Sunday, May 20, 2012

Picture frame earring holder


Supplies:
1 Frame (no glass or backing needed)- size of your choice
Chicken wire- enough to cover the back of the frame
Hot glue gun
Ribbon- I used 12" grosgrain, but if you want it to hang either shorter or longer, adjust to your preference
Possible staple gun (depending on the type of material that is used for the frame
Step 1: Attach the chicken wire to the back of the frame.
If you chose a softer wood frame, you can use the staple gun to attach the chicken wire to the back of the frame. If you chose a plastic or harder wood frame, I would use the hot glue gun to attach the chicken wire to the back of the frame.


Step 2: Attach the ribbon to the frame.
To attach the ribbon to the frame, if your frame has the hanging brackets, then tie the ribbon to the brackets. If not, just use the hot glue gun to attach the ribbon. When I first hung the frame, I realized that the ribbon was hanging so that you could see it behind the chicken wire- not what I was wanting. To fix it, I glued a little bit of the ribbon to the side of the chicken wire so that it would not peek behind for everyone to see

This frame is perfect for my entire hook earring collection- it keeps them organize as well as can be used as some décor!