Monday, September 24, 2012

Baby Monkey Gift Set


I love being able to make custom gift sets for people!  I get to personalize them and make exactly what they want.

This gift set includes an 8-inch plush ball, 1 applique burp cloth, 1 water resistant bib with vinyl catch, 1 diaper and wipe strap (holds up to 5 diapers), and 1 pacifier clip that can really be used to clip lots of things to the little ones. 

Sunday, September 23, 2012

Matching quilt pieces

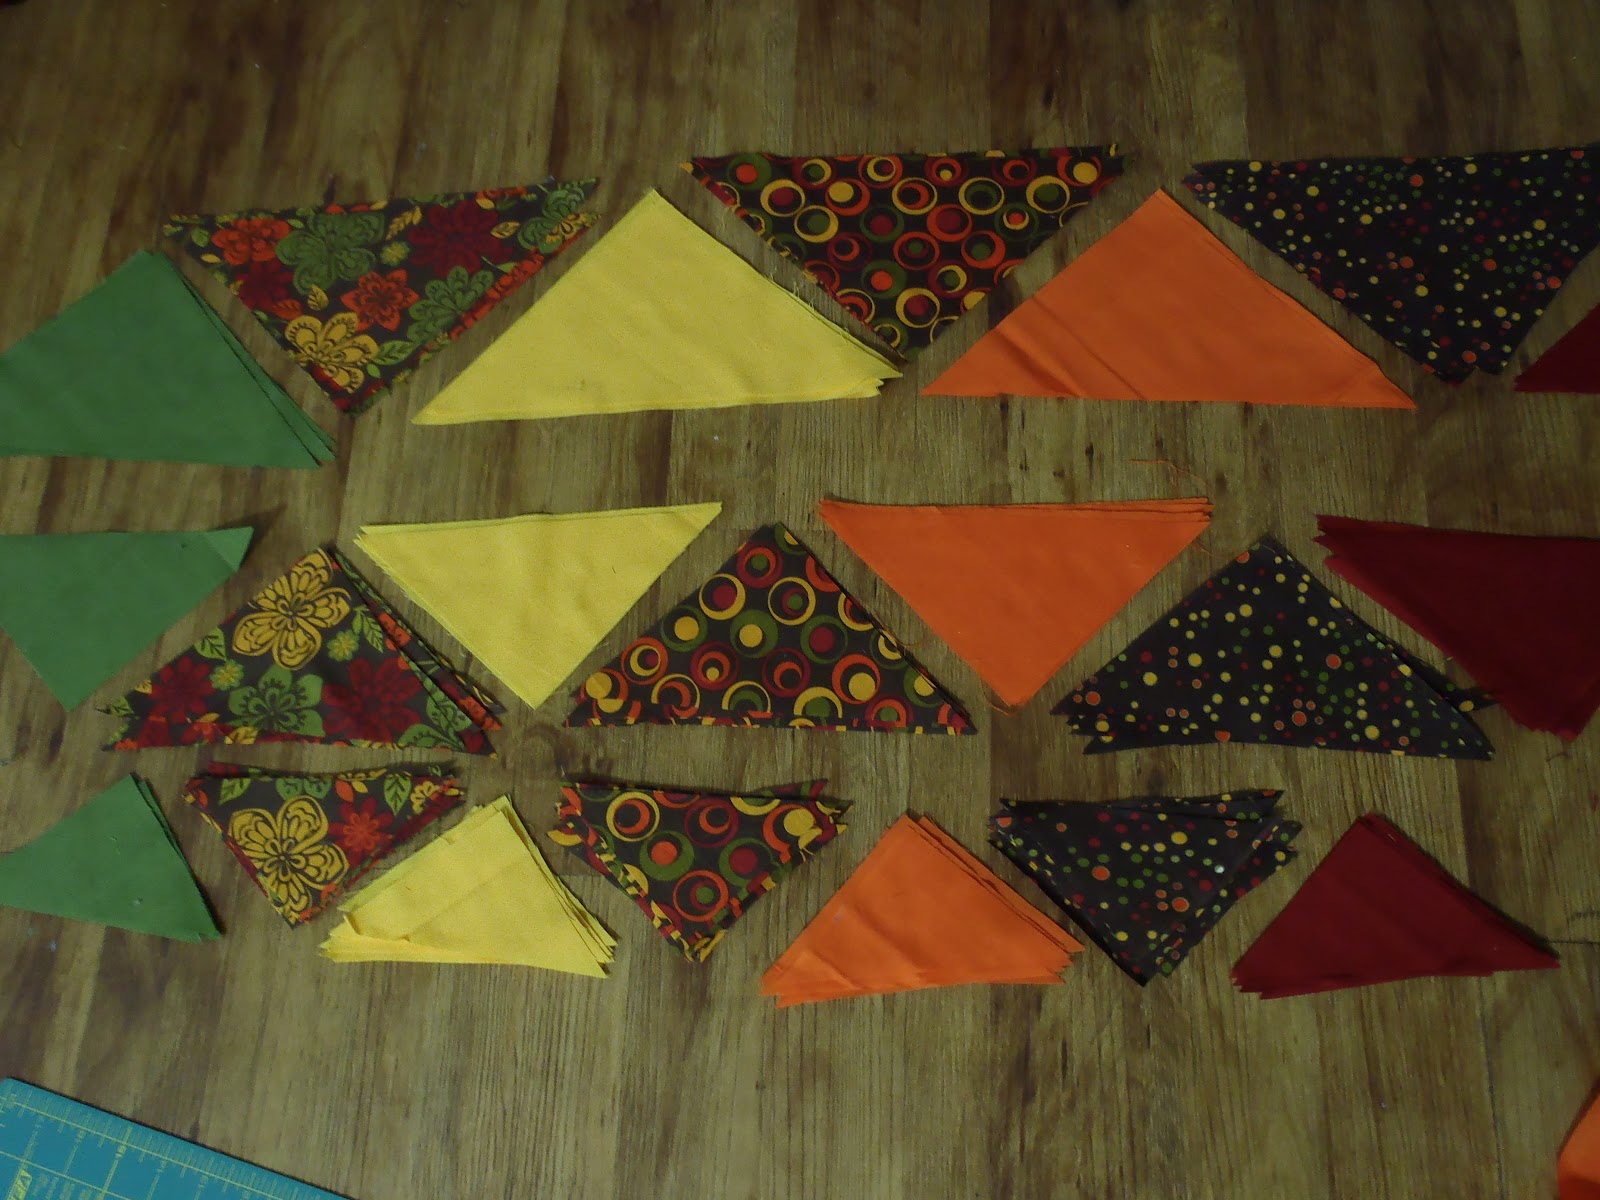
The last couple of weeks I worked on matching all of the pieces of fabric.  It was easiest for me to put all of the colors in order and then pull in order for each block.  For example, I used the following order for my blocks so that I did not ave any two colors touch.


Color #1- Green
Color #2- Flowers
Color #3- Yellow
Color #4- Dots
Color #5- Orange
Color #6- Circles
Color #7- Red


Time to match all of the blocks.  The way I set it up is that that I have 7 unique blocks.  I have started with the first of seven.  Take care when matching the triangles.  You want to make sure that when each half of the triangles are put together, they match as a single square.

Block one cosists of the following triangles:
Large green, medium flower, small yellow, small dots, medium orange, large circles

Block two:
Large red, medium green, small flower, small yellow, medium dots, large orange

Block three:
Large circles, medium red, small green, small flower, medium yellow, large dots

Block four:
Large Orange, medium circles, small red, small green, medium flower, large yellow

Block five:
Large dots, medium orange, small cirlces, small red, medium green, large flower

Block six:
Large yellow, medium dots, small orange, small circles, medium red, large green

Block seven:
Large flower, medium yellow, small dots, small orange, medium circles, large red


Again, this is just how I matched my triangles.  You can of course match however you want.  By doing it this way, the same blocks will line up diagonally for a pattern.

Tuesday, August 14, 2012

Scrap quilt

As I mentioned in week 1 of the quilt along, hang onto those scraps!  Below is one of the blocks that I made from random other quilts and projects.  At this rate I will have a block for each of the quilts and projects that I do. 

Sewing Cafe!

The projects completed in Sewing CafĂ© are designed for beginner sewers and most of the garments are geared towards women ages 20-30.  We will complete some projects for other age groups and some craft projects around the holidays for gift giving.

Some of the projects include how to up-cycle garments (perfect for those items you just can’t seem to part with but don’t wear any longer), basic skirt patterns, and how to make your own basic pattern.  If you have something you would like to see as a project, please let me know!

Upcoming projects and supply list

Thursday, August 23rd: Tank dress
What you will learn:
-          How to add pockets to a skirt/dress
-          Color blocking
-          How to sew with gathers
-          How to hem a garment

Supply list:
-          1tank that fits you
-          1 yard of at least 2 different color fabrics- no more than 3 colors (if you use 3 colors, then you only need ¾ yard of each fabric and you will have some left over)
-          Clear elastic
-          1 yard muslin (if you have a light weight fabric and want to line the skirt portion of the dress)

Thursday, September 13th: Pencil skirt

What you will learn:
-          How to take your own measurements and use a commercial pattern to sew the skirt (the pattern is proved for waist size between 26.5” to 34” and hip size from 36” to 44”)
-          Sew in an invisible zipper

Supplies:
-          2 yards of print woven bottom weight fabric
-          ¼ yard lightweight fusible interfacing
-          7”-long invisible zipper (match the color to the skirt fabric)
-          Presser feet: blind hem & invisible zipper
-          Thread: all-purpose & serger (optional)
-          Serger (optional)

Thursday, October 11th: Ruffle skirt


What you will learn:
-          How to sew gathers on a skirt
-          Sewing with elastic

Supply list:

-          Jelly roll of 40 print cotton fabric strips (if you do not want to use a jelly roll, you can purchase 1.5 yards of fabric you would like to use as the ruffles- I bought a total of 2 yards of fabric, enough for the gathers and for the actual skirt fabric)
-          ½ yard of coordinating 45”-wide print cotton fabric (1 yard for hips larger than 40”)
-          1”-wide elastic (amount determined by waist measurement)
-          All-purpose thread
-          Tailor’s chalk
-          Pinking shears
-          Safety Pin (or bodkin)
-          Hand sewing needle
-          Gathering foot (optional)


Thursday, October 25th: TBD
Thursday, November 8th: TBD
Thursday, December 13th: TBD

Things to know
Please check sunnydaycreativecreations.blogspot.com and Waco Bernina Sew & Quilt facebook page for photos of upcoming projects and the supply list!  All supply lists will be provided at least one week prior to the class date.

For all classes, please bring the following items (all of these items can be purchased at the store for your convenience):

-
         
Sewing machine with extra needles
-          Thread(s) to match fabric
-          Fabric safe marking tools (such as chalk)
-          Sewing pins with pin cushion (or something to hold the pins in)
-          Seam gauge
-          Seam ripper
-          Tape measure
-          Fabric scissors
-          Rotary cutter with plastic ruler (optional if you prefer to cut using rotary cutter- can purchase at the store after using the tool)

Let me know if you have any questions!

Saturday, July 28, 2012

Quilt along- picking fabric and cutting

So I have a HUGE stash of fabrics.  Some I have bought with I am sure something in mind, and some of it I do actually remember why I had bought it.  This fabric is some that I had bought last fall with EVERY intention of making a quilt.  Well I am now almost out of room in my fabric stash, so now it is time to make this quilt... So a quilt along anyone? 

I liked the ragged quilt my sister had made and had also seen a quilt that just had a whole bunch of mis-matched squares.  These are the two quilts that I used as an inspiration for my quilt.

Materials:
-1.5 yards of 7 different colors of fabric (I used four solid colors and three fabrics with a design)- total of 10.5 yards with a little left over
- 3/8 yard of coordinating fabric for binding
- batting (I like the 100% cotton batting)
- 3 5/8 yards for backing


 I want a quilt that will be a good sized lap quilt- so about a 48" x 64".   As with my sisters ragged quilt that has ragged squares, I want it a little more intrecit and have it as ragged triangles. 

For the first week, I cut all of my triangles.  The large squares measured 8.5" x 8.5"; medium squares were 6.5" x 6.5"; and the small squares were 4.5" x 4.5".  I needed 7 squares of each size and each color.  I then cut each of them in 1/2 to make 14 triangles of each size and each color- total of 96 (you will only need 13 triangles for two of the colors of each size).  With each of the large squares measuring 8.5" x 8.5" with a 1/4" seam allowance, I will have a quilt with 6 squares along the top and 8 down the side, this quilt will measure 48" x 64"- slightly smaller, but still a good size.


Next week I will be working on mixing and matching the triangles to get 96 stacks of triangles.  Lots of sewing ahead!

Be sure to keep all of the little scraps- they will make a great quilt later... another project!

Saturday, July 14, 2012

Valence and Pillow


My sister and I went shopping for fabric for her new place a little over a year ago...yes it took me this long to finally get around to the project.  She wanted a valence and pillow.  The project itself only took a couple of hours to do and it should look wonderful in her place.  At least she is still at the same place as when I originally took the measurements for the valence.

I absolutely LOVE this flower fabric.  I have enough left that I should be able to make a pillow or two for myself. 

Her new decor should go wonderfully in her place.  We both love reds and bright colors!