Tuesday, November 14, 2017

Flower Girl Wands

My fiance has the cutest little nieces ever!  I decided I wanted them to do something other than the normal throwing of flowers when they walk down the isle (hopefully they will make it all the way).  Thank you pintrest for the inspirations!  We do not have specific colors for the wedding other than the bridesmaids and groomsmen have lapis (purple) dresses or ties.  Other than that, I wanted bright, fun colors.

For the flower girl wand, there were so many options and ways we could do it that it was a bit overwhelming.  I decided that I did want an actual flower on the wand with some fun ribbon streamers and little bells so that you could hear them coming.

Supplies:
Ribbon- whatever and however much you would like
12" dowl rods
Glue gun
small bells
white floral tape
Pretty Flowers


I would suggest to glue the flowers on the rob and then add the floral tape to ensure the flowers are secure.


Wrap the wood stick with ribbon and... tada! You have some super cute flower girl wands.  Our nieces loved them.  And then of course they got to take them home to play with later.

Don't we have some of the cutest little flower girls.


Photo credit: RachelMyersPhotography


Friday, August 25, 2017

Table "numbers"

My fiance and I LOVE to travel.  Instead of the normal table numbers, we decided to have tables with places that we have been together.  I needed something to hold the papers showing the locations of where people are going to be sitting.  Wine corks! (If you have seen the ring toss post, then you know we drink wine.)

The base of our picture holders needed to be substantial enough to have a wire going about 8-10" high that will hold the locations.

Using 8 wine corks per number stand, we created our table number holders.


I decided that the needed a little extra color, so I added ribbon and then some cute little flowers to each of them.


And tada! Super cute table number holders. This picture is from the wedding and all I can say is AMAZING! (And if you have not already figured it out, we had by far the best photographer wife and husband team!)


Photo credit: RachelMyersPhotography


Tuesday, May 9, 2017

Marry Me!

I have to have the most thoughtful and best fiance ever!  He knows I like to do "crafty" things and when I saw wall hangings made out of license plates, we made one representing my college.  Baylor Bears!


One night, he tells me he wants help making one for his college so I figured, sure, we made one we can do another one- easy enough.  So he tells me to lay out the letters, we will take measurements and then make it.  He went to Missouri University- the Tigers- MIZZOU for short.  I say this, because other than the M, I kept asking, what are we spelling again? Very confused but not completely usual for me either.

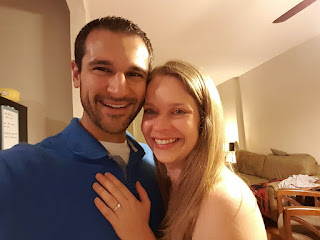
Well, come to find out, we were not spelling anything to do with his school- he proposed!

Now to actually make the sign from the proposal because we do want it our wedding.


Saturday, May 6, 2017

Organizational Skills

Like many other people I am sure, I have tried several different ways to keep my life, both work and personal, organized.  I am always having sticky notes for this, or random pieces of paper for that.  Well enough of all of that.  A friend of mine turned me onto the Bullet Journal- best thing ever!

What is this bullet journal you ask?  Well, the best thing since cake!  (I know, it is supposed to be best thing since sliced bread- but I like cake better.)  After watching the video from the original bullet journal plus a handful of other individuals takes on it, I adapted it to my needs.  I wanted something to keep track of wedding planning, workouts, training plans, projects wanting to work on and then just the normal daily activities.  Below are a few samples of my journal.

Necessities:
Journal- I picked a less expensive one in case I did like it so mine is lined.  When it is time for the next one, I will be purchasing the Leuchtturn1917.

Fun colored pens- because who doesn't like fun colors.
And washi tape- because again, add some color.


Now to the pages.
Future Log- super important because now I know what is going on for a year in advance.

Monthly view- also important because now I see more details on my monthly basis with some set goals, tasks, wedding stuff, and things for next month.

Daily view- There is only so much time in the day so I cannot overload things that I need to do. I also use this as a spot to figure out what to make for the week.  Not a ton of planning but at least I get a bit of a grocery list together.

One of my favorite collections- my training plan for a half marathon coming up!  This one I am tracking a little bit of everything.  Xtraining, running, weight, dog walks, H20 intake- everything!  I am even tracking how many drinks, or rather limiting, my weekly drinks. No more than 5.

Projects- I always have a list of different things that going on but never seem to know what to work on. So my project lists.
 

And food- so now I don't have to stand in front of the fridge wondering what to make for dinner and it makes it easier to make my weekly meal plan.

Last- my wedding planning, well everything!


Thursday, May 4, 2017

ABC's for kids

Time for creativity again with the kiddos!

I have several nieces and nephews- all young so perfect time for their learning!  I made these soft and washable alphabets for them to help learn their letters.  They are fun colors on both sides with a little carry pouch that can go anywhere.  These can be found on my Etsy shop if you would like some for you (or your kiddos).


One of my nieces even got this crazy soft blanket for her to crawl around on.  I really should make one of these for me.  It has the soft fabric on both sides with the silky boarder that as a kid, I could just sit there with forever and it would instantly relax me. (ie no more crying)


Tuesday, May 2, 2017

Wedding Invitations

There are so many things to do in order to get ready for a wedding. Find an officiant, make a list of who you are going to invite, and the invitations so you actually have people there!  Kind of an important detail to not over look- you need those witnesses.

My fiance and I looked at several websites known for wedding invitations and while those graphic designers know what they are doing, none of the designs really struck us as something we really wanted.  We wanted something elegant but knew we were not going to pay $5+ per invitation for what we wanted.  So came our crazy idea- we create them!  After lots of trial and error, we finally came up with a design we absolutely love!


We used a wax seal, tissue paper, and corner cut outs for a "fancy" invitation.  We even went all out with the envelope and included a liner in there.

Items Needed:
- Invite design (we took to our local print shop and had it printed on 110 lbs card stock in a cream/ivory color)
- Corner punch- you can pick anything and can find them on amazon or any craft store such as Hobby Lobby
- Paper cutter- You can have the print shop cut the invitations to size but with as many as we had and doing trial and errors at home, we decided to spend the $40 on a pretty nice new paper cutter. I tried my scrap-booking cutter at first but quickly realized that it is not meant for cutting that many invitations and the blade dulled far to quickly.
- Wax stamp (we bought ours off of Amazon for less than $10 shipped)
- Wax- we tried several different ways to actually put the wax on the ribbon and found that for as many as we were making, the most efficient way was using the wax sticks.  They use the small glue guns which you can buy for less than $10 amazon or target.  The wax we purchased from Oriental Trading under their wedding part of the website.
-Glue gun (small and regular)- we used the small glue gun for the wax and the regular glue gun to hold the ribbon together.  If you do not have a large glue gun or two different glue guns, no big deal it will likely just take a little longer. I would suggest doing all of one part and then moving to the next step if you only have one glue gun to not waste any of the sticks.
- Clear glue sticks
- Ribbon- the silver was 1.5" wide and the purple was 1" wide.  We experimented with several different widths and went with those as the wax looked great and did not spill over to the actual invitation

Directions:

The invitations was the easy part once we figured out our design.  We printed them to a 5x7 size.  I would suggest investing n a nice paper cutter for a very clean and crisp edge.  The print shop will usually also cut these for you as well for little to no charge but I am kind of OCD and wanted complete control.  If it got messed up at all, it was only my doing.

After the invitations are cut, sit down in front of a good TV show or movie and start punching out your corners!  Make sure you have a trash can near by for all of the scraps- you will have lots of them.


Now onto the ribbon and wax seals...

I used a 5x7 card board as my template to make all of the wax and ribbons.  Each ribbon was cut 11" in length- just enough to overlap but not waste the ribbon.


We used a regular glue gun to adhere the ribbon on the back side.  We did an assembly line version and had several of the ribbon backs being glued and drying while the front was getting the wax put on.  Once you get the hang of it, it actually went fairly quickly.


Next, we added a small dab of the colored wax (not to exceed the size of the smaller ribbon) to the front of the ribbon band and quickly placed the wax seal on the wax.  I would suggest letting it dry for at least a minute and then in between each time using it, I would also suggest putting it on ice.  When we did not let the stamp cool, it progressively took longer for the wax to set.  If you find that the seal starts to stick to the wax to much, we took a paper towel with a little bit of coconut oil (the only oil we had in the house) and rubbed it on the metal part.  This helped to keep it coming on and off of the wax much easier.  I found reapplying the oil every 6-8 seemed to work the best.


For the tissue paper, we cut it ever so slightly smaller than the 5x7 invitations.  This was to prevent the paper from getting to crunched when inserting it into the envelope.  

We really liked the way the invites ended up turning out.  My sister even made the best RSVP cards for us! Way more on the fun side than the fancy and formal invitations.  (The invitations in the wedding I think are going to be the most formal part of the whole day)


Thursday, March 2, 2017

Colorful block quilt

In case you were wondering, I like to sew. I have a slight problem though...when I walk into a fabric or craft store, I always walk out with fabric. Usually fabric I do not even need.  This realization really hit home for me when I was packing my belongings for my next move and I realized I had almost as many tubs full of fabric as I did my own clothes.  Oops.

Good thing before I moved I decided to go through a little bit of my fabric and make a super crazy colorful quilt with random pieces of fabric that I had left over from other projects.  I love how colorful and fun it is.  Because I do not have a large machine, for the quilting I decided to do straight lines along all of the seams.  As always, my little helper was there to make sure it worked really well- I think she approved.

The kitty cat had to stay warm

It is a Queen Size!

Friday, February 24, 2017

Remembrance t-shirt quilt

I had a friend of my Mom's contact me after she had seen one of the t-shirt quilts that I had made.  Her father had passed away and he had numerous very funny shirts.  She asked me to help her remember her father by creating a quilt with all of his favorite t-shirts.

I absolutely loved how it turned out.  All of the shirts were different sizes which made the placements of everything a bit more challenging than originally expected.  Because there were not enough shirts of just the right size, I included some fun printed fabric to fill in where other t-shirts would go.

Now to finally make one for myself...